Many options in cPanel are intended to make managing tasks associated with hosting a website easier. The Images section of cPanel makes it simple to work with images for your website by making thumbnails, converting image file types, and scaling/resizing images.
Using the Thumbnailer tool that is a part of cPanel, we will demonstrate how to build a thumbnail image for you in this guide. Since thumbnails load more rapidly, this is a simple technique to quickly resize (or scale) a large image. This may lead to general increases in page speed and an enhanced user experience.
Access thumbnail option in cPanel –
- Log in to cPanel.
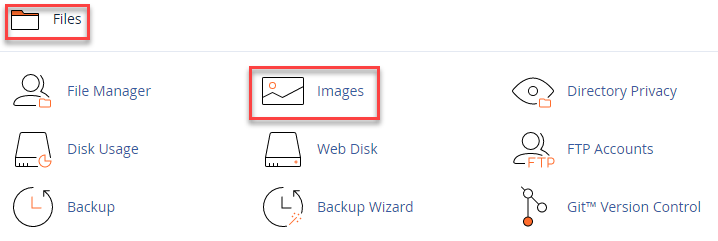
- Click on the “Images” option under the “Files” option.

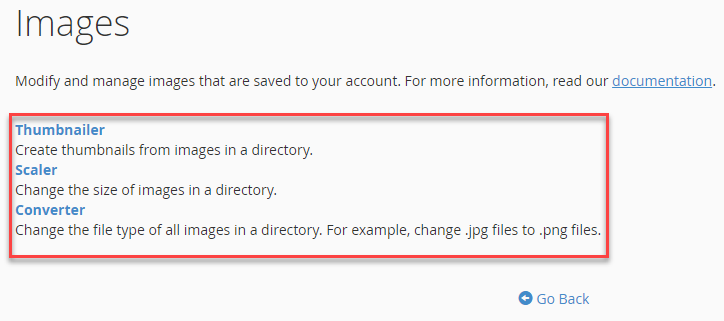
- You will enter the images page. Here you will find three options:
- Thumbnailer.
- Scaler
- Converter

Let us explore the “Thumbnailer” option in detail:
- If you want to create thumbnails from images in a directory and hoard those in a thumbnails subdirectory, use this option. One thing to be taken into consideration is that the images must be already uploaded to your cPanel account.
- Select the “Thumbnailer” option.
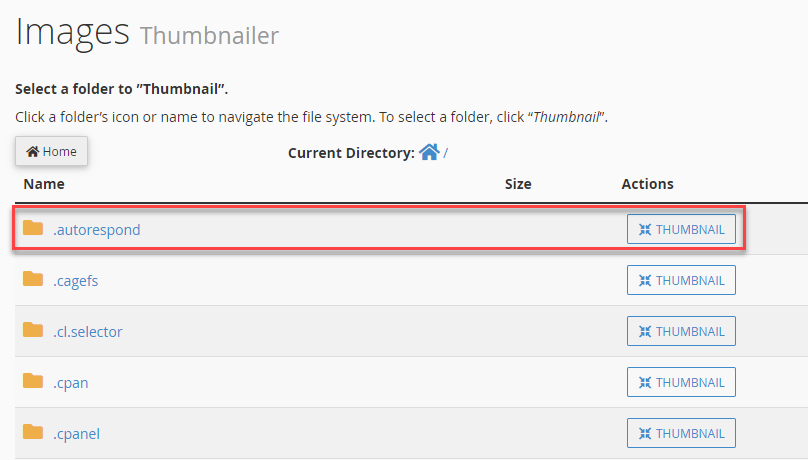
- Select the folder hording the images you wish to thumbnail and click on the “THUMBNAIL” button on the right side of the screen.

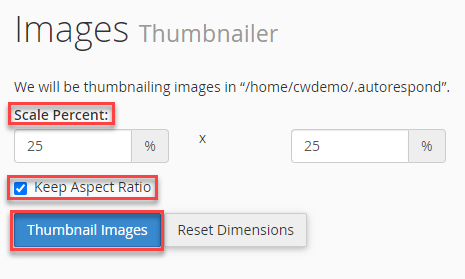
- Enter the percentage by which you want to scale the width and height of the image.
- If the “Keep Aspect Ratio” button is not already selected, select it to make the setting stable. It prevents the image from being stretched by maintaining the image’s width to height ratio.
- Click on the “Thumbnail Images” button.

- You will get a message that the images have been thumbnailed.

It was great explaining you all. Hope you liked our article and understood it very well. For more information, do contact our support specialists.
