Regular backups are important for protecting your server and website data. WHM provides a built-in Backup Configuration feature that lets server administrators automate the backup process for cPanel accounts, databases, and system files.
This guide explains how to configure and schedule cPanel backups in WHM, including how to set up backup types, retention policies, file selections, database options, and remote destinations. By following these steps, you can ensure your data is securely backed up and easily restorable in the event of data loss or server failure.
Table of Contents:
Accessing the Backup Configuration in WHM
- Log in to WHM as the root user.
- In the left-hand search bar, type “Backup.”
- Click “Backup Configuration” under the Backup section.

Enabling Backups
- In the “Backup Status” section, click “Enable Backups” to activate cPanel backups.
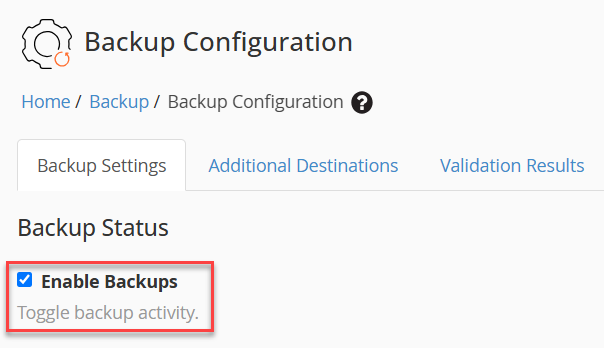
- Once enabled, additional configuration options will appear.
Setting Global Backup Options
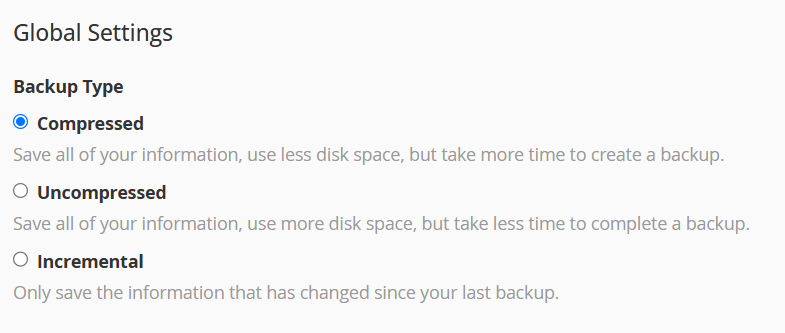
- Backup Type: Choose how your server stores backups.
- Compressed: Saves all data in a compressed format. Takes longer but uses less disk space.
- Uncompressed: Stores data uncompressed. Faster, but uses more space.
- Incremental: Saves only changed files since the last backup. Fastest and uses minimal space, but limits restore options.
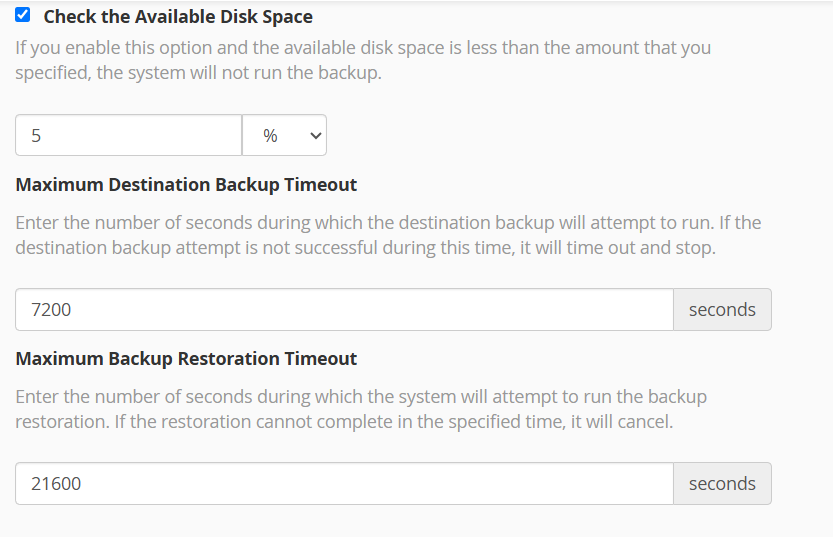
- Check the Available Disk Space: Ensures backups only run if enough disk space is available. If free space is below the set limit (e.g., 5%), the backup won’t start.
- Maximum Destination Backup Timeout: The time (in seconds) the system will try to complete the backup. If it exceeds this time (e.g., 7200s), it stops automatically.
- Maximum Backup Restoration Timeout: The time allowed (in seconds) for restoring a backup. If not completed within this limit (e.g., 21600s), the process is cancelled.
Configuring Backup Scheduling and Retention
Set when and how long backups should be retained.
- Backup Daily: Select specific days for daily backups and define how many to retain (1–9999).
- Backup Weekly: Choose a weekly backup day and the number of retained backups.
- Backup Monthly: Select the monthly backup day and retention count.
Selecting Files to Back Up
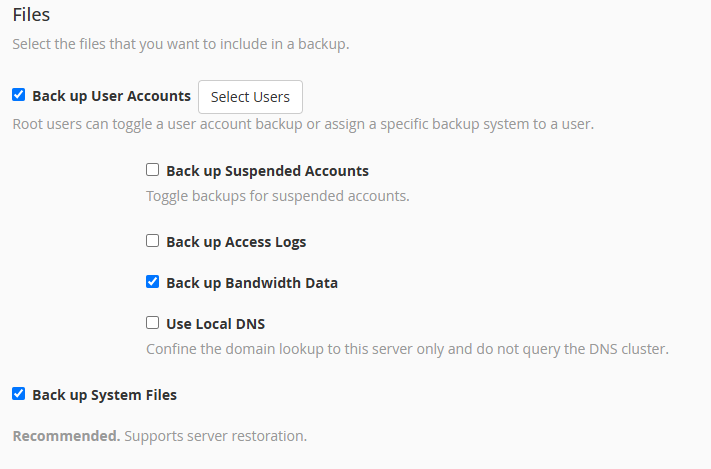
Enable Backup Accounts to include user accounts, then configure the following:
- Select Users: Choose specific users for backup.
- Backup Suspended Accounts: Include or exclude suspended accounts.
- Backup Access Logs: Enable or disable saving of access logs.
- Backup Bandwidth Data: Backup bandwidth usage data.
- Use Local DNS: When enabled, domain lookups are limited to this server (no external DNS queries).
- Backup System Files: Recommended to enable essential files for full server restoration.
Configuring Database Backups
Choose how to back up MySQL databases:
- Per Account Only: Backs up each account’s databases individually using mysqldump.
- Entire MySQL Directory: Backs up all databases from /var/lib/mysql/.
- Per Account and Entire MySQL Directory: Performs both account-level and full server backups.

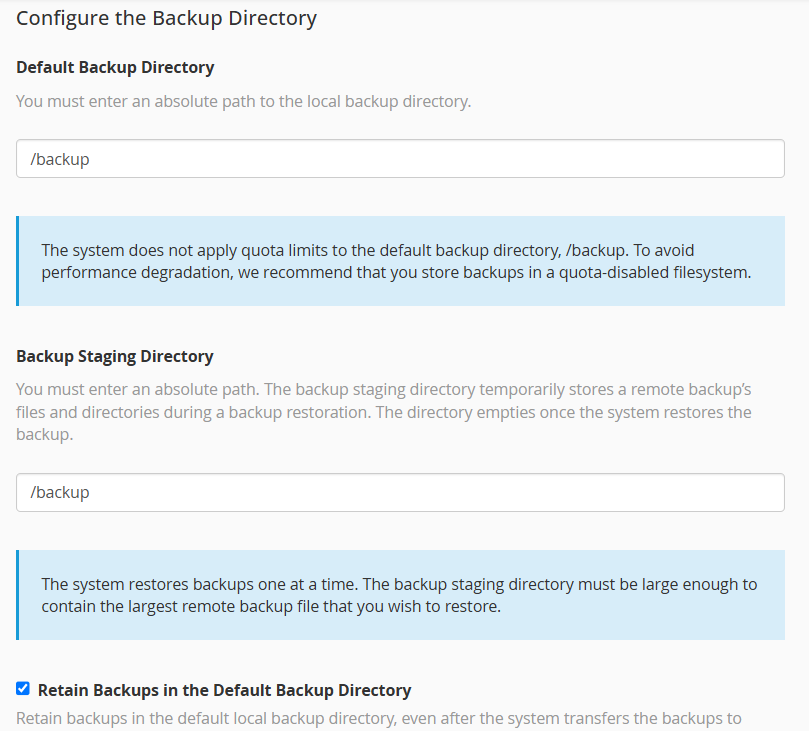
Choosing a Backup Directory
- Default Backup Directory: Set to /backup/ by default. Enter a custom path if needed.
- Retain Backups in the Default Directory: Keeps a local copy after transfer. Disable to delete after transfer.
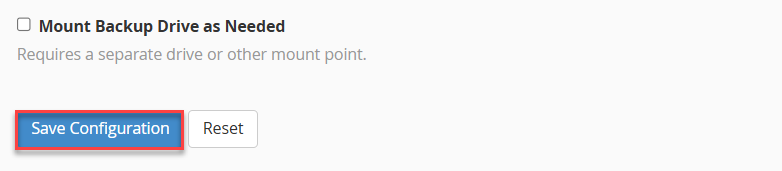
- Mount Backup Drive as Needed: Enable to automatically mount backup drives defined in /etc/fstab/.
Adding Additional Backup Destinations
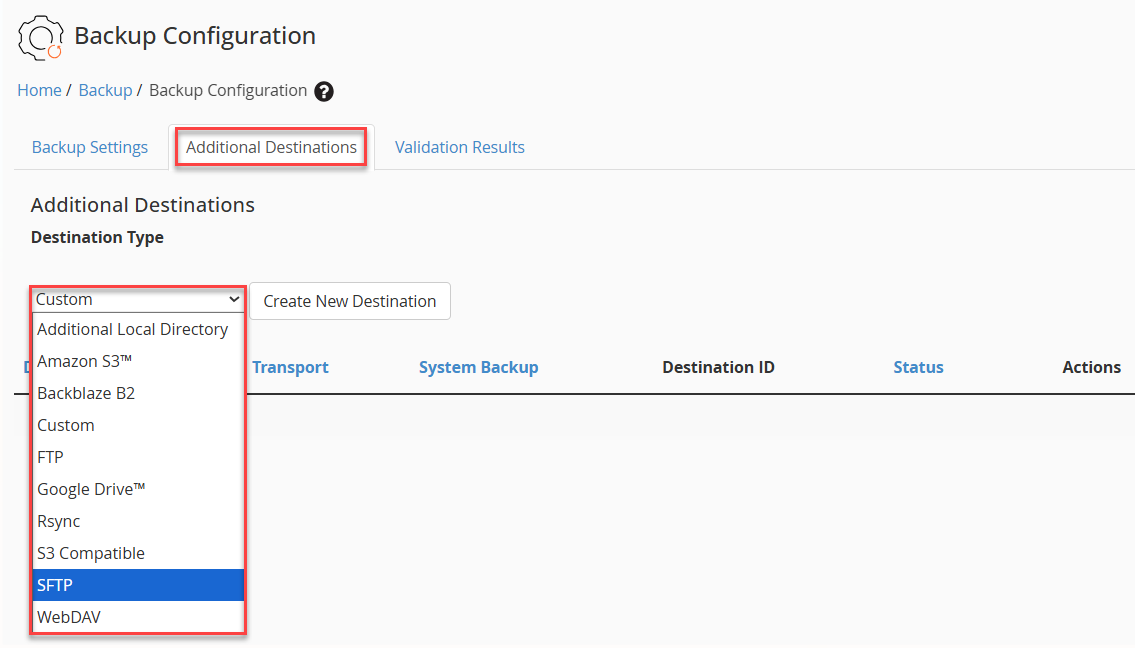
You can configure remote or additional storage destinations to enhance data backup flexibility and redundancy.
Supported options include Amazon S3, FTP, Google Drive, Rsync, SFTP, WebDAV, Additional Local Directory, and Custom destinations. Each destination type requires its own setup configuration.
Saving the Configuration
Once all backup settings are configured, click “Save Configuration” to apply your changes.
Conclusion
This way, you have successfully configured automated backups in WHM. Regular backups help protect your data and ensure quick recovery in case of system issues or data loss.
Want to secure your backups offsite? Check out our guide on How to transfer WHM backup to a remote destination via FTP