It is essential to check your website and scan your email for viruses and this is very easy to do using cPanel’s in-built Virus Scanner.
Simply follow the instructions below.
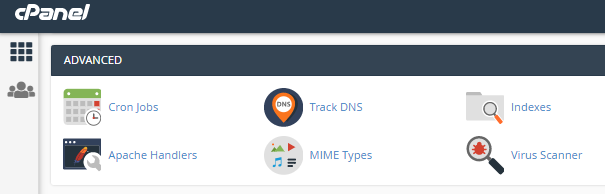
- Log in to your cPanel account.
- Scroll to the Advanced section and click on Virus Scanner.
- When the new page opens, you will be given a list of options of things to scan.
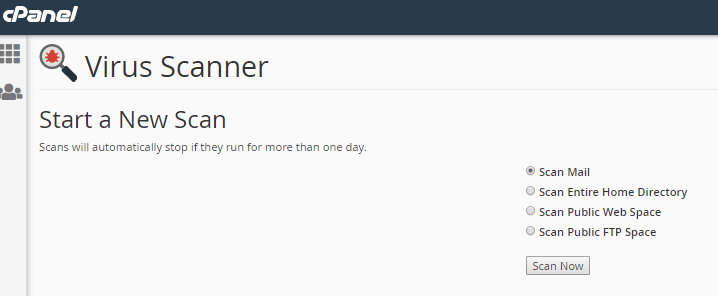
- Choose the files that you wish to be scanned (email, home directory, web space, or FTP space) and click on the Scan Now button.
- When you click Scan Now, a new page will appear showing you the progress of the scan and any files that may have been infected.
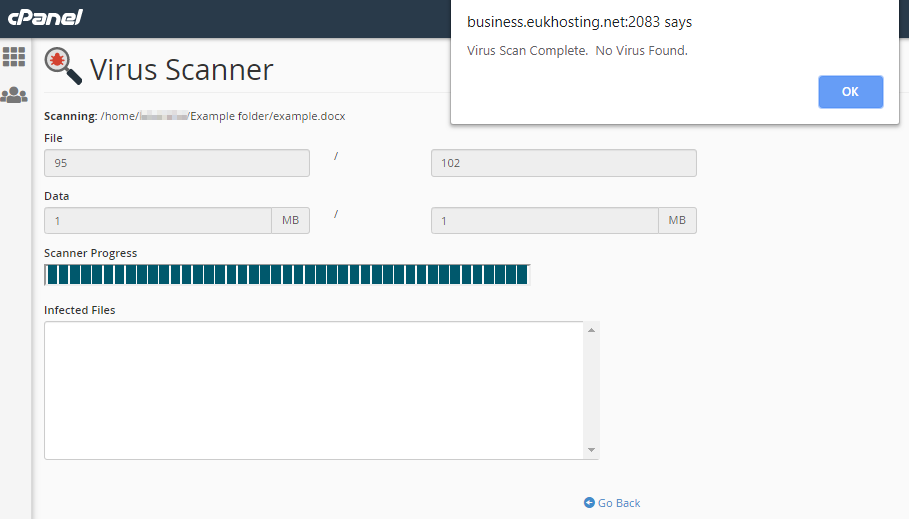
- In the example above, no viruses were discovered. In this case, clicking the blue OK button would take you back to the Start a New Scan page. However, if a virus was found, clicking the OK button would take you to a new page where the threat could be dealt with.
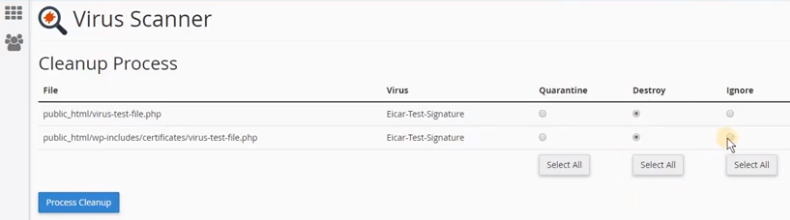
- Where a virus is found, you are given three options of what to do with it: Quarantine, Destroy or Ignore. Once you have decided which actions to take, click on your chosen option and then click on the blue Process Cleanup button to carry that action out.
- A new screen will appear to confirm the Cleanup Process has been completed successfully.
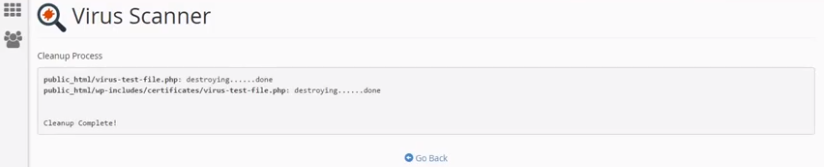
- The process is now completed. Clicking on the Go Back button will take you back to the Start New Scan page.
That’s it!!
If you’re a Plesk user, you can still scan WordPress sites directly in the Plesk control panel, ensuring easy security checks and peace of mind.
