This guide shows how to set up private nameservers on your Dedicated or VPS server. Proper configuration ensures your domain points to your server correctly and gives you full control over DNS settings.
Key guidelines:
- If your welcome email does not include the IP addresses, you may always contact our support team.
- After obtaining the IPs, you can proceed to register the nameservers with your domain registrar.
- For nameserver help, get in contact with the company that registered your domain name.
- Once the nameservers are registered, you have to configure them on the server.
Let us now take these actions:
- Open WHM and log in.
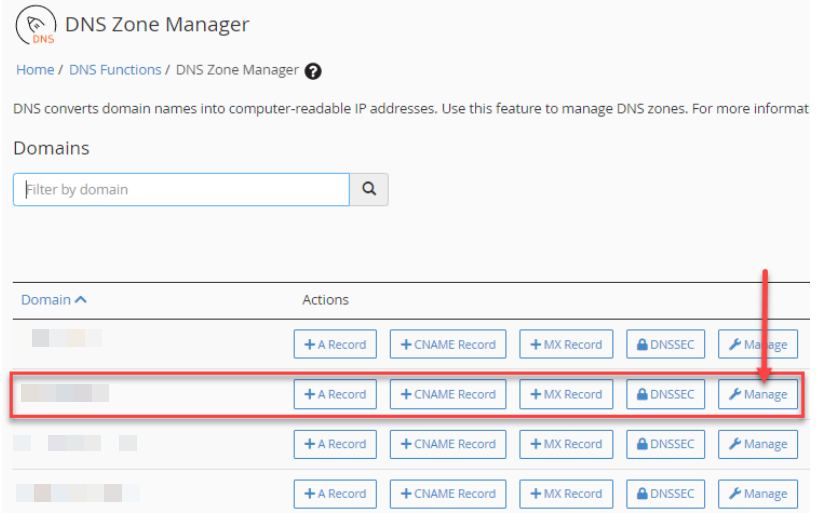
- Select DNS Zone Manager.

- Select the Domain and click on the Manage button.
- Update your SOA record with your primary nameserver and a valid email. Then, create A records for ns1.domain.com and ns2.domain.com pointing to their IPs, and select Save all records.
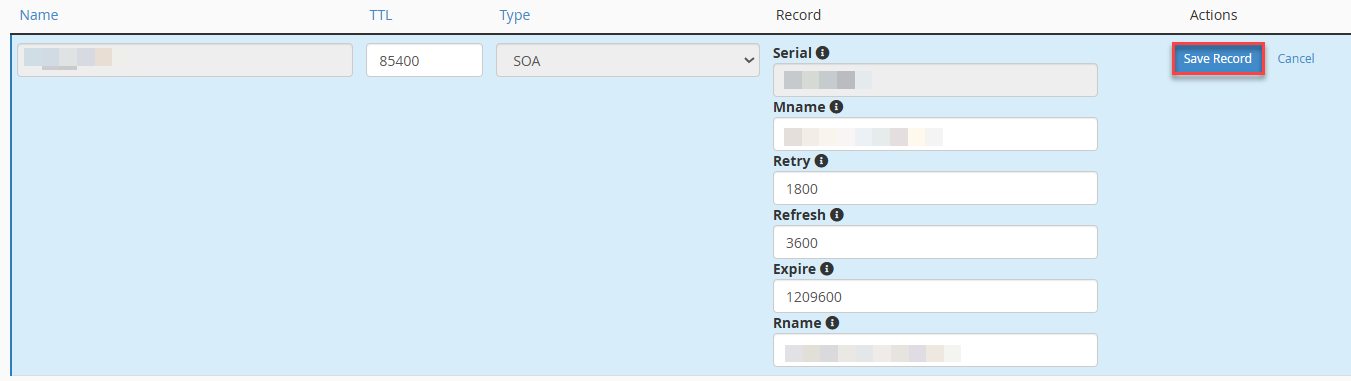
- If you want to use the newly created personal nameservers for the domain name itself, you must also use them on the side of the domain registrar and in WHM >> DNS Zone Manager >> domain name in question >> NS records and SOA records (use nameservers ns1.yourdomain.com and ns2.yourdomain.com for yourdomain.com).
- You may enter your nameservers for all freshly established cPanel accounts (as well as all addons before they are added to cPanel) using the Basic WebHost Manager Setup >> Basic Config option in WHM.


- It takes a full day or two for the DNS changes to propagate globally and take effect on your hosting.
That’s it!
Sometimes, you need to restart your dedicated and VPS server after configuring private nameservers for proper performance. Check out our guide on How to Restart a VPS or Dedicated server using WHM for more guidance on this.
We sincerely hope you found our content knowledgeable! Please frequently check our KB section for any such information.