This page will tell you how to install the Perl module with cPanel.
The Perl module allows you to make use of already-written code to ensure the proper functioning of your programs.
Let’s look at the steps in depth:
- Log in to the cPanel account.

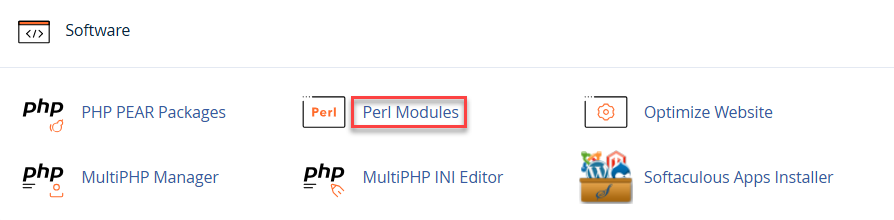
- Select Perl Modules under the Software category.
- You can just type the name of the Perl Module into the search box to find it.
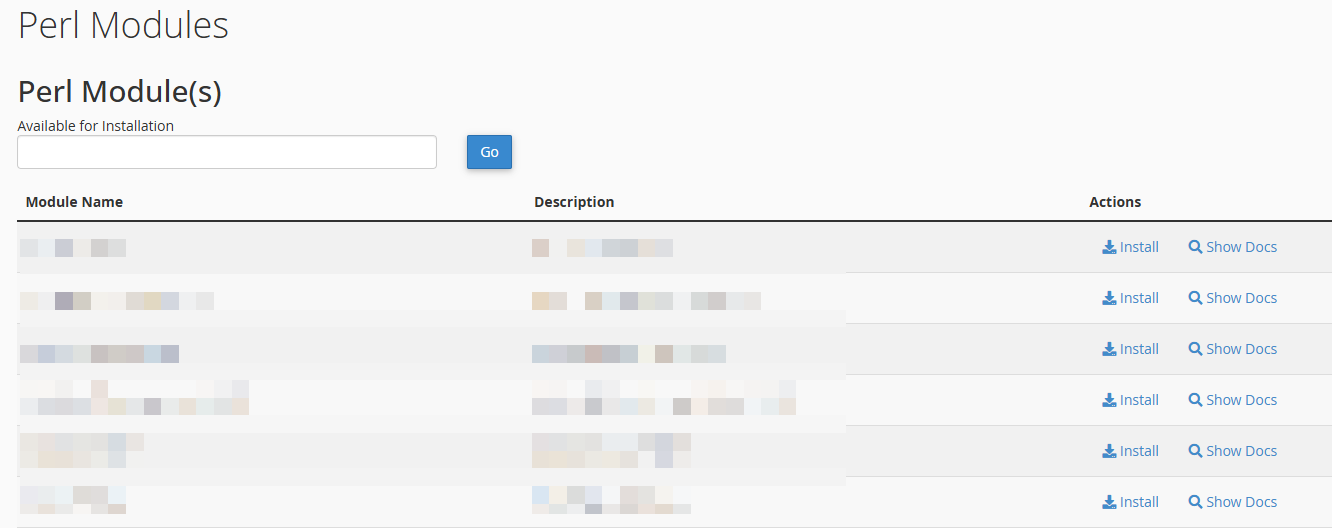
- Click the Show Available Modules button to see the alternative Perl Modules which are available.

- If you already know the name of a module you wish to install, type it into the Install a Perl Module section and click Install Now.
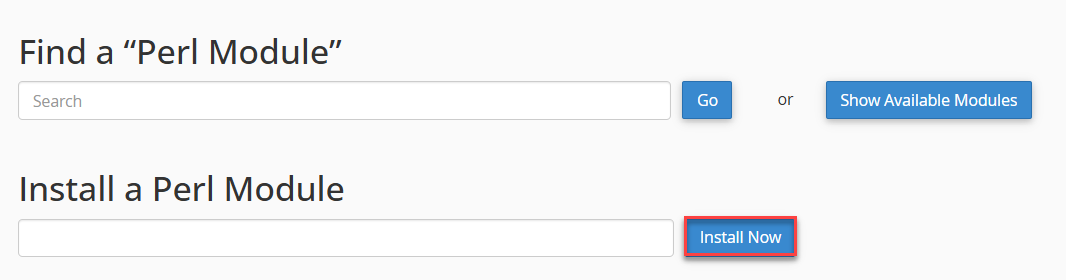
- You will obtain a notice once the installation is complete.
- By tapping the “Show System Installed Modules” button, you can see the system-installed modules.
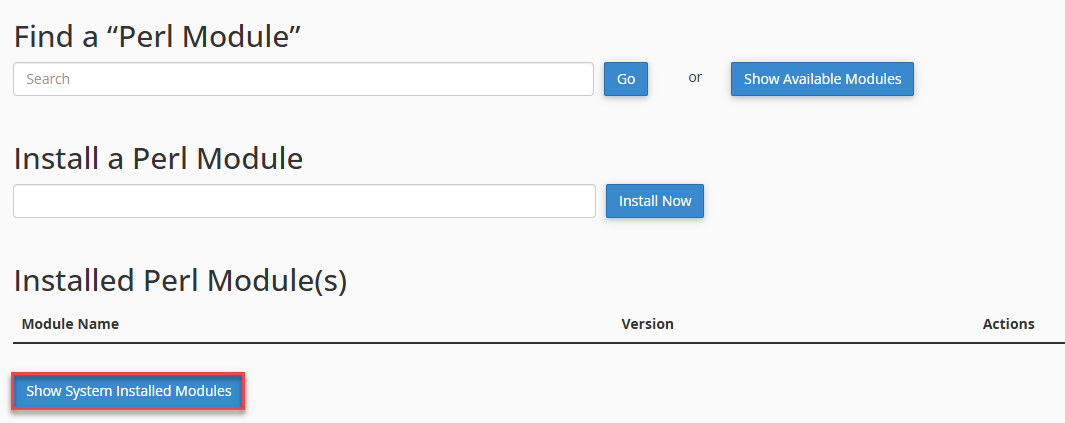
- The Perl Module has been successfully installed.
- The installed modules can be discovered in the list of Perl Modules that Have Been Installed.
We hope you have a good understanding of how to install the Perl module in cPanel. If you run into any problems when installing it, feel free to contact our team at any time. We are here for you 24 hours a day, 7 days a week.
Also Read: How to check whether a Perl module has been installed