Installing an SSL certificate in Plesk helps secure your website, webmail, and data by enabling HTTPS encryption. Plesk makes it easy to install a free SSL certificate using Let’s Encrypt, ensuring improved security and trust for your domain.
Note: You must first obtain an SSL certificate for your website before proceeding with the instructions.
Let us follow the steps:
- Go to your Plesk account and log in.
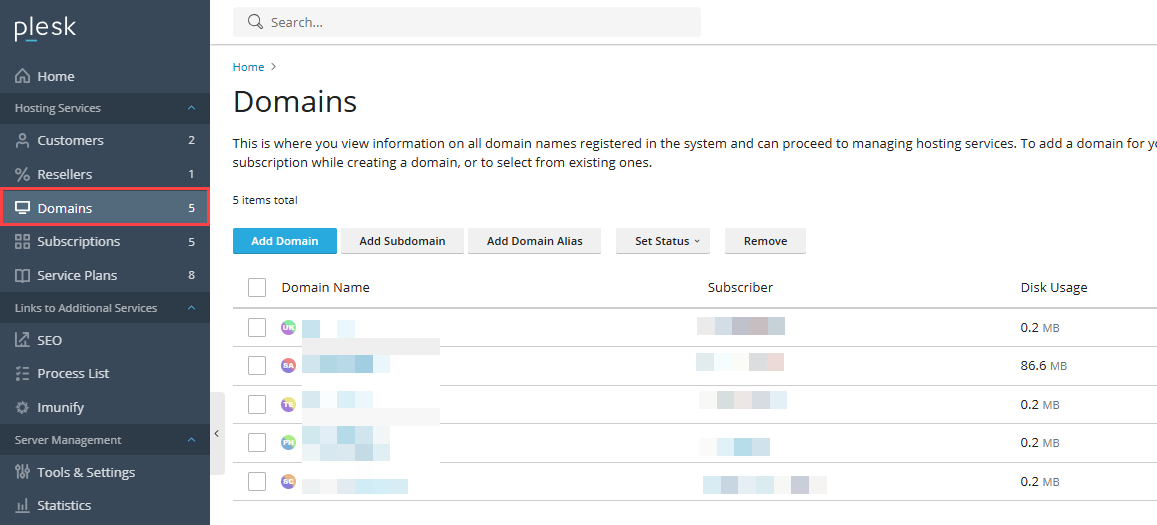
- Select ‘Domains’ from the left-hand menu. And select your Domain.
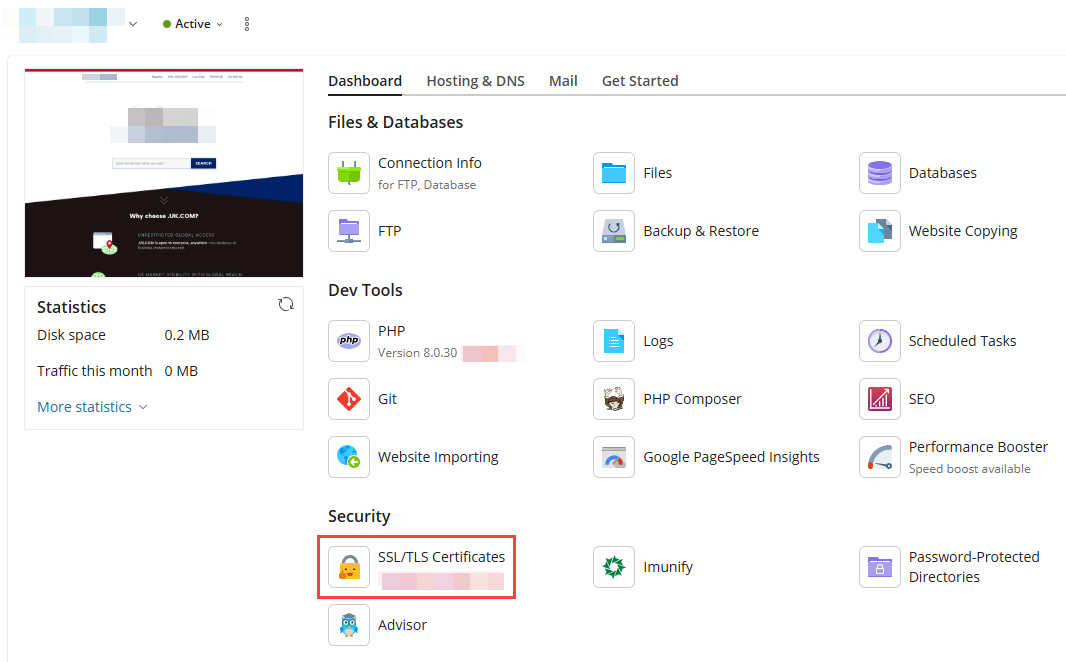
- Select the ‘SSL/TLS Certificates’ option from the drop-down menu.
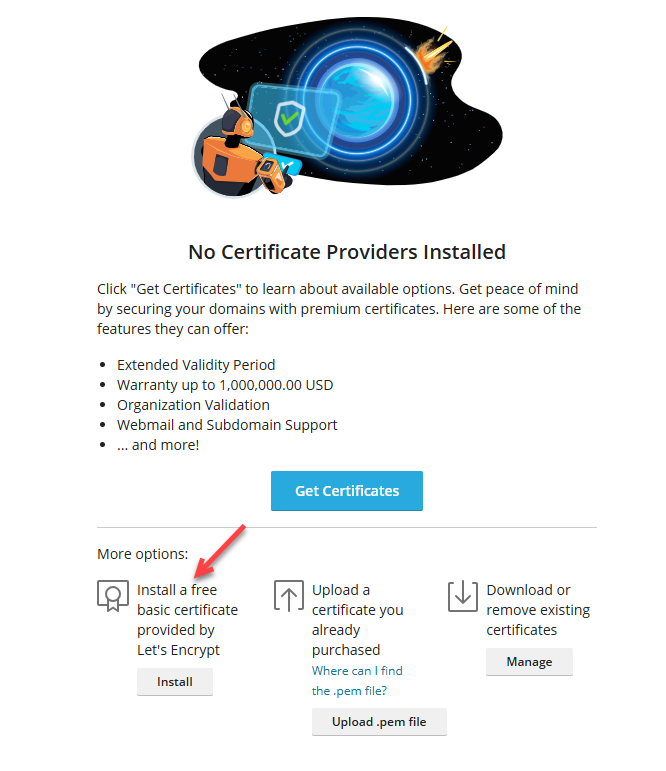
- Under More options, click Install for the free Let’s Encrypt certificate.
-
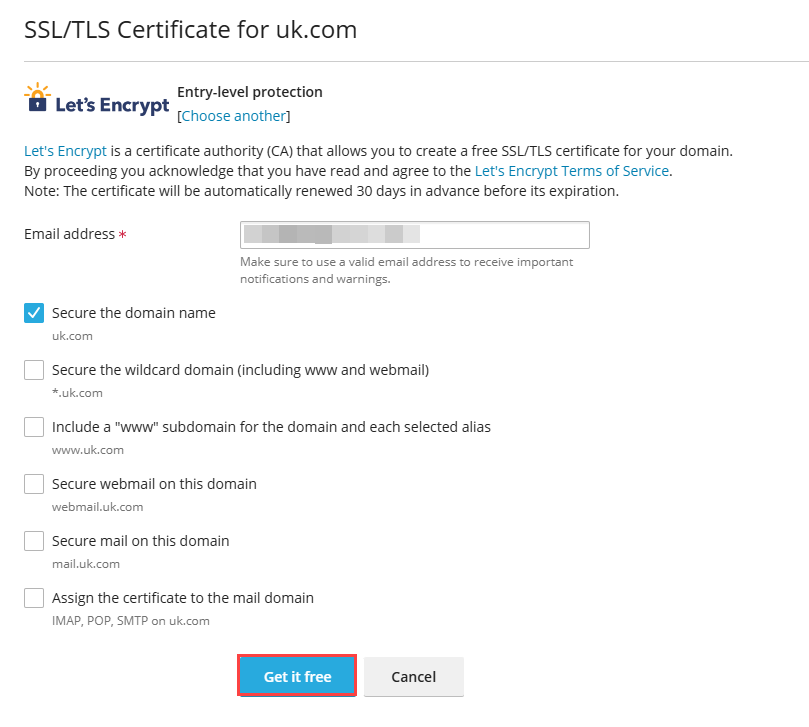
Select the required options. It’s recommended to enable:
-
Secure the domain name.
-
Include the www subdomain and aliases.
-
Secure webmail on this domain.
-
Assign the certificate to the mail domain
-
- Enter a valid email address to receive certificate notifications, then click Get it free.
The Let’s Encrypt SSL certificate will be generated and automatically installed for the domain. It remains valid for 90 days and will be automatically renewed by the SSL It! extension.
For assistance, feel free to connect with our support team.