Before installing a Let’s Encrypt SSL certificate, make sure the domain name is resolved from the Internet to the public IP address of the Plesk server. If you are not sure, you can check the availability of your domain name by going to DNS Lookup by MxToolBox.
To install the SSL certificate in Plesk follow these instructions:
- Log into Plesk account.
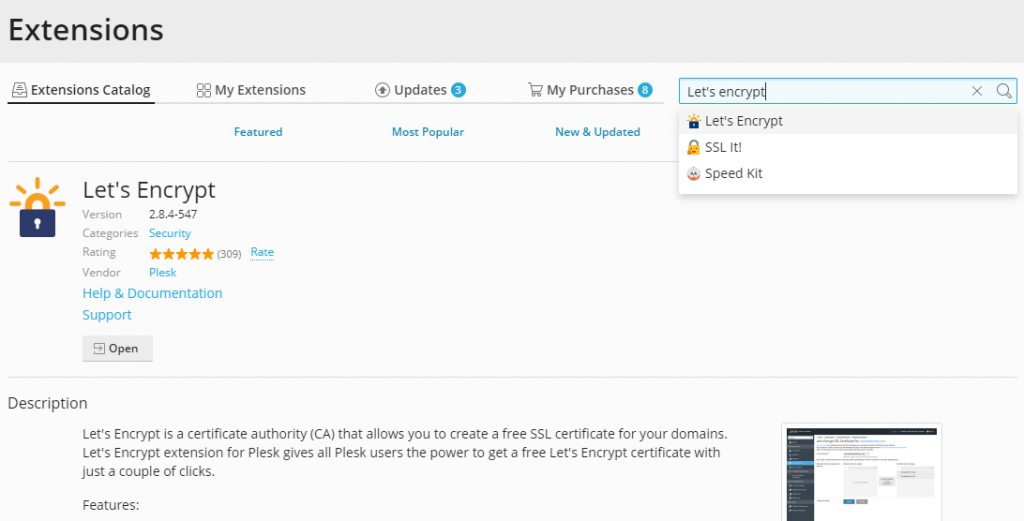
- Click on Extensions in the left-hand panel.
- In the search bar type Let’s Encrypt. Once you have found it, click Open.
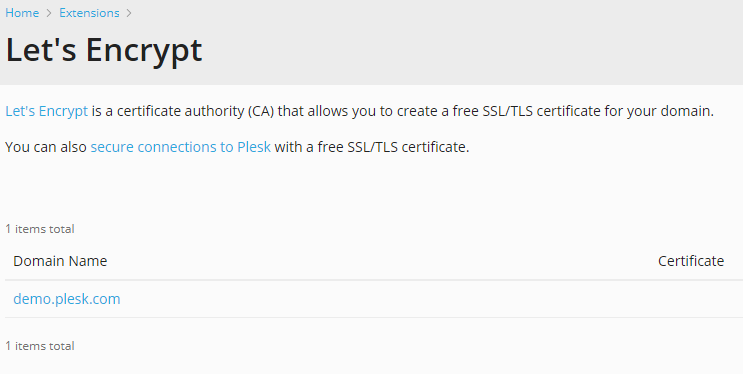
- When the Let’s Encrypt screen opens, it will display a list of all your domains. Click on the domain for which you want to install an SSL certificate.
- Now, a new screen will appear to complete the installation process for your selected domain.
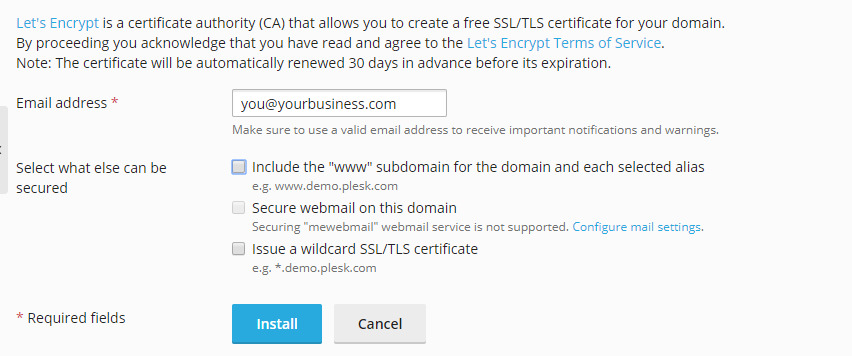
- Enter your email address to receive important updates.
- Select your options. Plesk recommends including the ‘www’ subdomain for the domain and each selected alias together with the Secure webmail on this domain option.
- Finally, click Install.
This will generate the SSL certificate and secure your domain. Let’s Encrypt certificates are valid for 90 days and are automatically renewed by the Let’s Encrypt extension.