In this article, you will learn how to create a database in Plesk using the Plesk control panel. Plesk supports popular database servers such as MySQL, MariaDB, and Microsoft SQL Server (availability depends on your server OS and configuration).
Note: Databases are created at the subscription level, not using the root or administrator system account. Ensure you are logged in as a valid Plesk user with access to the relevant subscription.
Steps to Create a Database in Plesk:
- Log in to your Plesk control panel using your Plesk username and password.
- From the left-hand menu, click on Databases.
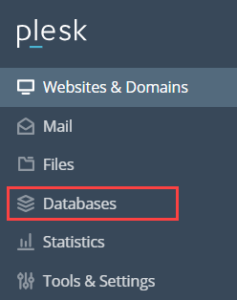
- If you manage multiple subscriptions, select the subscription under which you want to create the database.

- Click on the Add Database button.
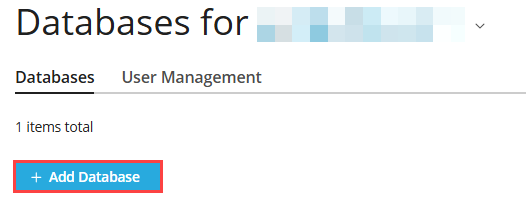
- Under General Settings, provide the following details:
- Database name: Enter a name for your database.
- Related site: Select the domain or website that will use this database.
- Create a Database User under User Settings:
- Enable Create a database user.
- Enter a Database username.
- Set a Password (or generate one automatically) and confirm it.
- Choose the appropriate permission level:
- Optionally enable User has access to all databases within the selected subscription if required.
- Select the required Access Control options.
- Click Create the database.

- Once completed successfully, you will see a confirmation message. The newly created database will now appear in the Databases list for the selected subscription.

Important Notes
- For security reasons, domain names, usernames, and sensitive details should always be masked or hidden in screenshots used in documentation.
- Database availability and types depend on whether your server is running Linux or Windows and how Plesk is configured.
If you require further assistance with database management in Plesk, please contact the Webhosting UK support team or refer to additional knowledge base articles on the Webhosting UK website.