In this article, we have explained how to password-protect a directory in cPanel. Password-protected file sharing improves the security of your sensitive folders and data.
Let us follow the steps:
- Log in to the cPanel account.
- Select the “Files” section.
- Click on the “Directory Privacy” option under the files section.

- You will enter a new interface that lists all the directories.
- Select the directory and click on the “Edit” button.

- You will be directed to the “Directory Privacy” page.
- Select the “Password Protect this directory” check box.
- The name box will be activated if you click the password-protect check box.
- Enter the name of the directory to be protected.
- Finally, click on the “Save” button.

- You will receive the final success message.

- You can see the symbol of a lock after the directory has been protected.

Create a User for the Protected Directory
After enabling password protection, you must create a user who will be allowed to access the directory.
- Under Create User, enter a Username.
- Set a Password (or use the password generator).
- Click Save to create the user.
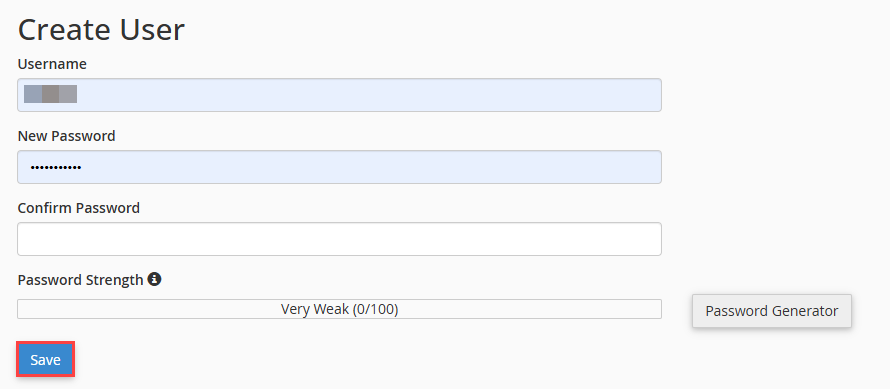
Important: Without creating a user, the directory will remain inaccessible.
In this way, you can add password protection to a directory in cPanel.
You can disable the directory listing to further increase the security and privacy of the directory. It protects sensitive files such as backups and configurations, ensuring that only authorised users can access them.
Wasn’t it useful? We hope that now you will be able to password-protect the directory in cPanel. Don’t forget to check our latest Web hosting plans.