This guide will show you how to add a domain to your Plesk account. Just follow these few easy steps and you will be successful in adding a new domain to your Plesk account.
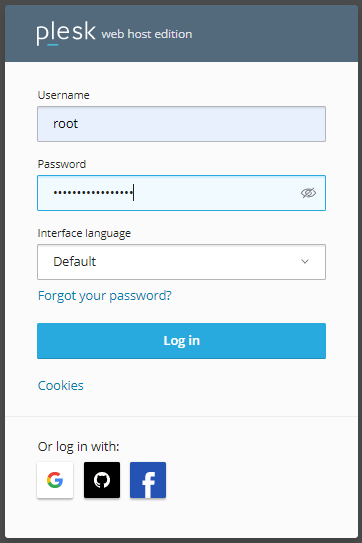
- Log in to Plesk.
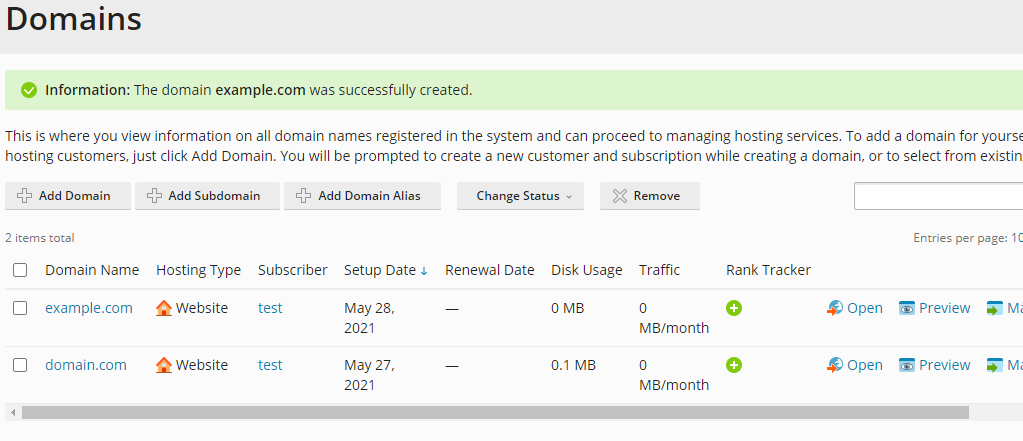
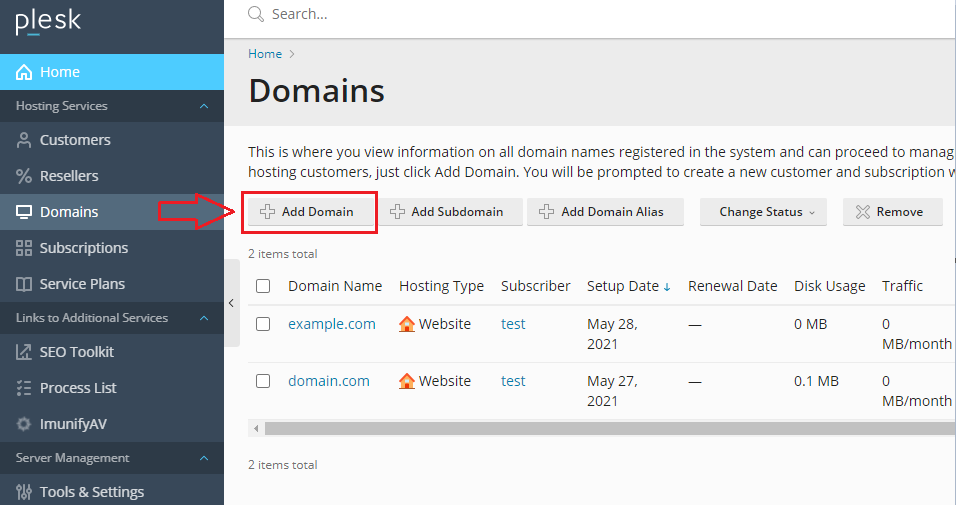
- Click on Domains from the left-hand side.

- Click Add Domain button after entering Domains.
- A new page with the title Adding New Domain Name will display.
- After www, type your domain name in the Domain Name area.
- By default, the name of the primary domain appears in the Location of the website’s files.
- Choose any choice from the Hosting type drop-down box. The website hosting option gives you the ability to host a website as well as email services. You can use the forwarding option to divert traffic from one website to another. You can host DNS and email services, but not a website, with no hosting option.
- Tick the box Activate the DNS service if you’re using your hosting provider’s DNS service. Untick this box if you’re utilizing a DNS service offered by your registrant.
- Tick the checkbox Activate the mail service if you want to use email services on the same server.
Untick this box if you’re utilizing a remote mail service.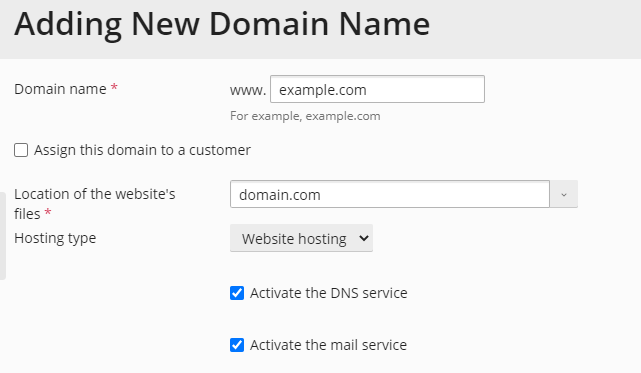
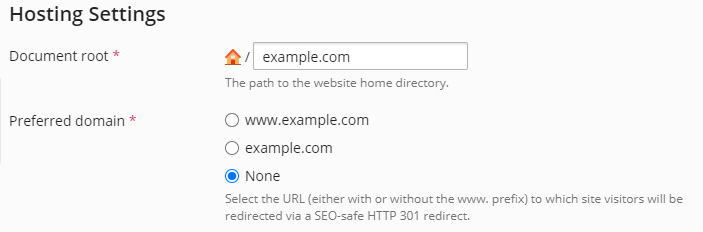
- Plesk fills in the Document root and Preferred domain settings in the Hosting Settings automatically. You can change the parameters to suit your needs.
- If your domain is pointing to a server and you wish to secure it with a Let’s Encrypt SSL certificate, check the box Secure the domain using Let’s Encrypt and then click on the OK button.
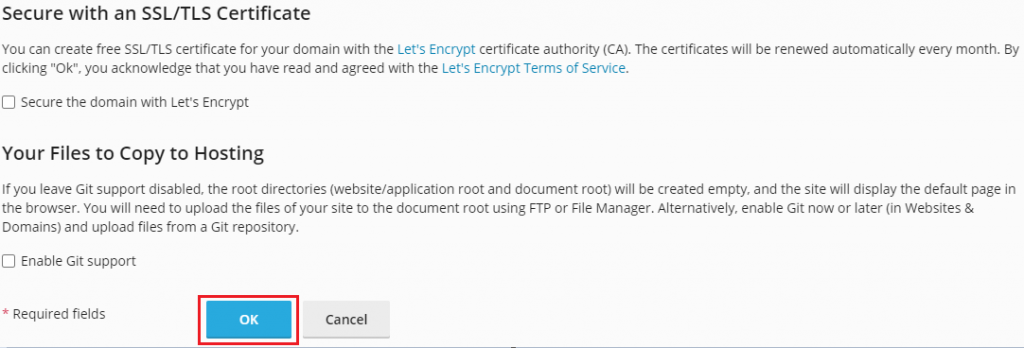
- This process requires 2-3 minutes and once done you will get a success message.