This article explains how to assign Let’s Encrypt SSL using the Plesk panel. It ensures your website is safe and trusted by offering free, automated, and easily manageable SSL/TLS certificates.
Steps to assign Let’s Encrypt SSL using the Plesk panel:
- Access your Plesk control panel using your login credentials.
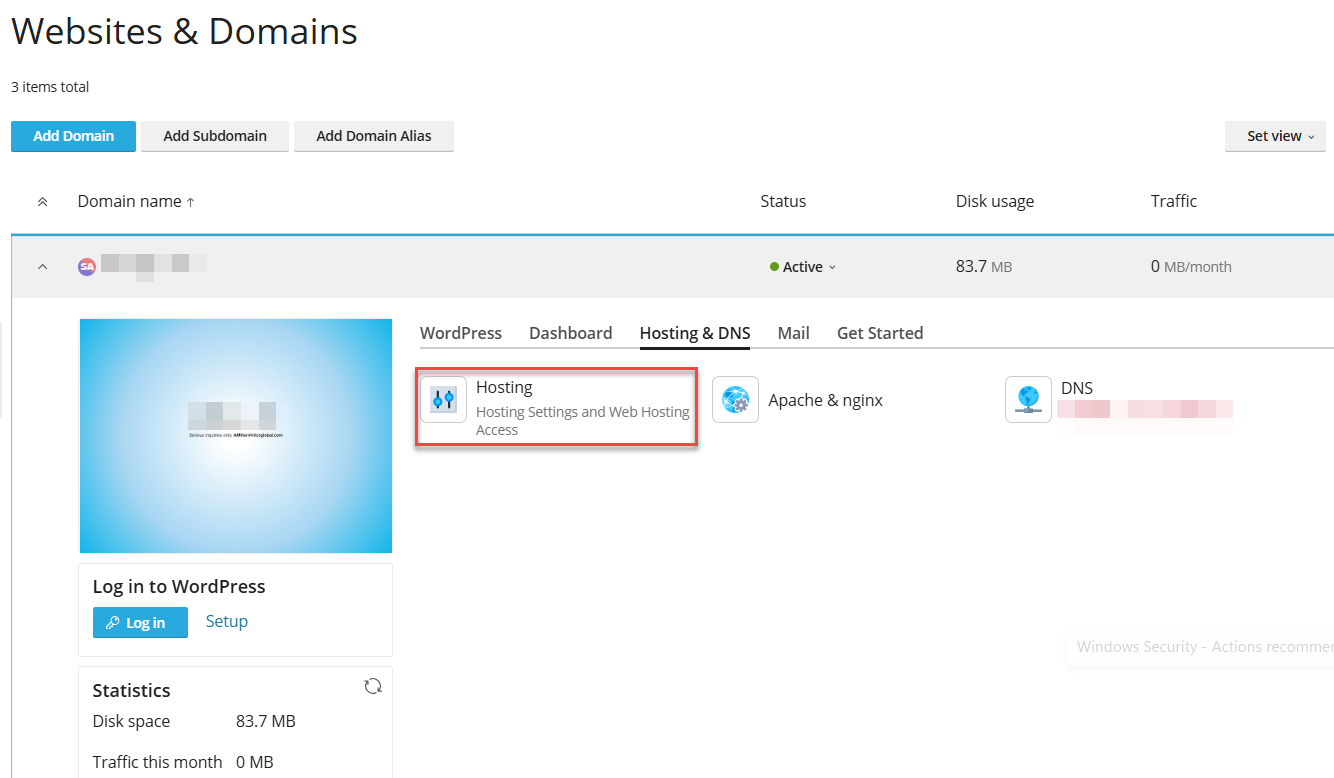
- Go to Websites & Domains.

- Select the domain you want to secure with SSL.
- Select the Hosting & DNS tab and click on Hosting.
- Check Enabled and Redirect visitors from HTTP to HTTPS via a SEO friendly 301 redirect.
- From the Certificate dropdown, select Let’s Encrypt.
- If it’s not listed, first install it via SSL/TLS Certificates > Let’s Encrypt.

- Click Save.

By following these steps, you can easily assign a Let’s Encrypt SSL certificate to your domain using the Plesk panel.