Nameservers are responsible for directing Internet traffic to your servers, so choosing the right one ensures that your domain resolves correctly and that your website is accessible. Therefore, choosing the right nameservers in WHM is important to effectively manage your domain’s DNS settings.
In WHM, you can configure nameservers to point to the hosting provider’s servers or to customisations you set. This guide will walk you through simple steps to select and set up nameservers in WHM. This helps ensure your domains are properly routed and your sites stay online.
Follow the steps:
- Log in to WHM.
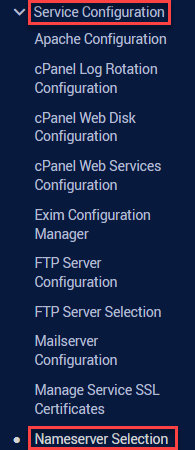
- Select the “Service Configuration” option and click on the “Nameserver Selection” sub-option.
- You will enter a new interface where you will find different types of Nameservers. Its advantages, disadvantages, and notes are given.
- Select the nameserver and click on the “Save” button.
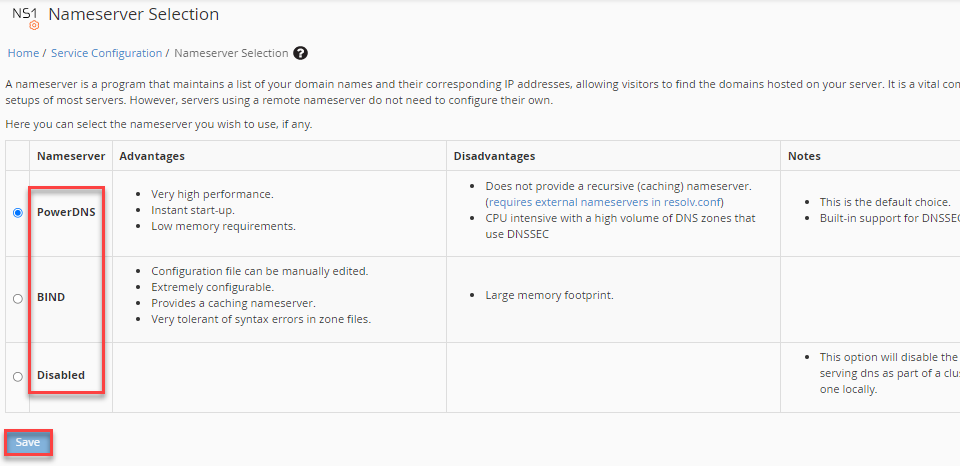
Note- “Bind” is the default Nameserver and it is suggested one. You might want to utilise NSD if your server has less RAM. Be aware that it does differ from BIND in a number of ways.
For detailed instructions on changing nameservers in WHM, check out How to Modify Nameservers in WHM Panel.
Thus, the tutorial is over. If you need extra help, do contact our WHUK’s support staff at your earliest.