In this article, we explain how to reduce or shrink the SQL Server database size safely and effectively.
Important Instructions Before Shrinking the Database:
- You cannot shrink a database while a backup is in progress, and you cannot take a backup while the database is being shrunk.
- A database cannot be shrunk to a size smaller than its original (initial) size. For example, if a database was initially 10 MB and later grew to 2 GB, the minimum shrink size will still be 10 MB.
- Ensure sufficient free space is available on the disk before performing the shrink operation.
Set Database Recovery Model to Simple (Recommended)
Before shrinking the database, it is recommended to set the Recovery Model to Simple, as shrinking may not work effectively in Full recovery mode.
Steps to Set Recovery Model to Simple:
- Open SQL Server Management Studio (SSMS).
- Right-click the database and select Properties.
- Go to Options.
- Set Recovery model to Simple.
- Click OK.
Note: After completing the shrink process, revert the recovery model to Full if required.
Method 1: Using SQL Server Management Studio
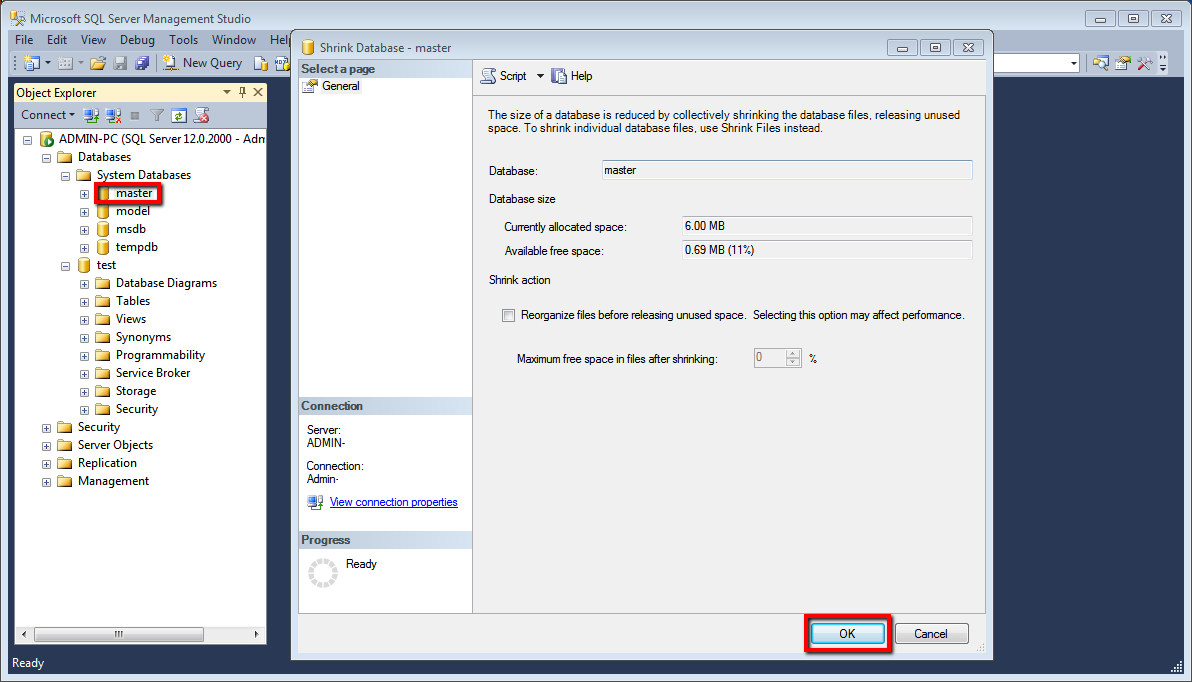
- Right-click on the Database name >> Tasks >> Shrink >> Database.
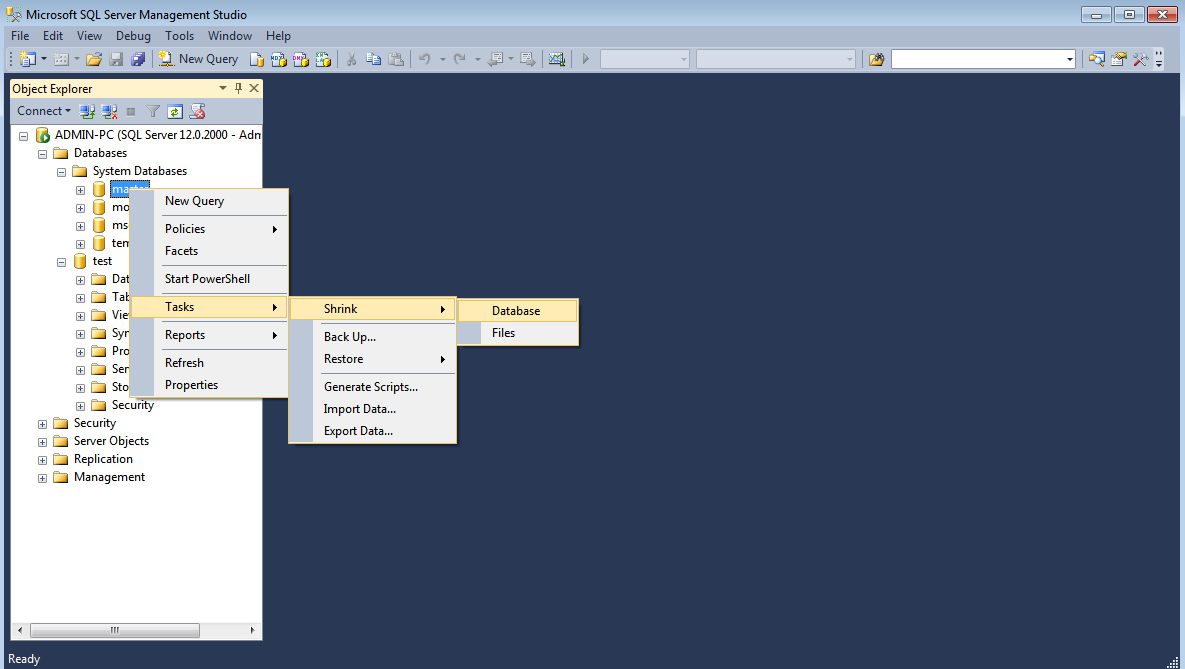
- Then Click OK.
Method 2: Using Transact SQL Command
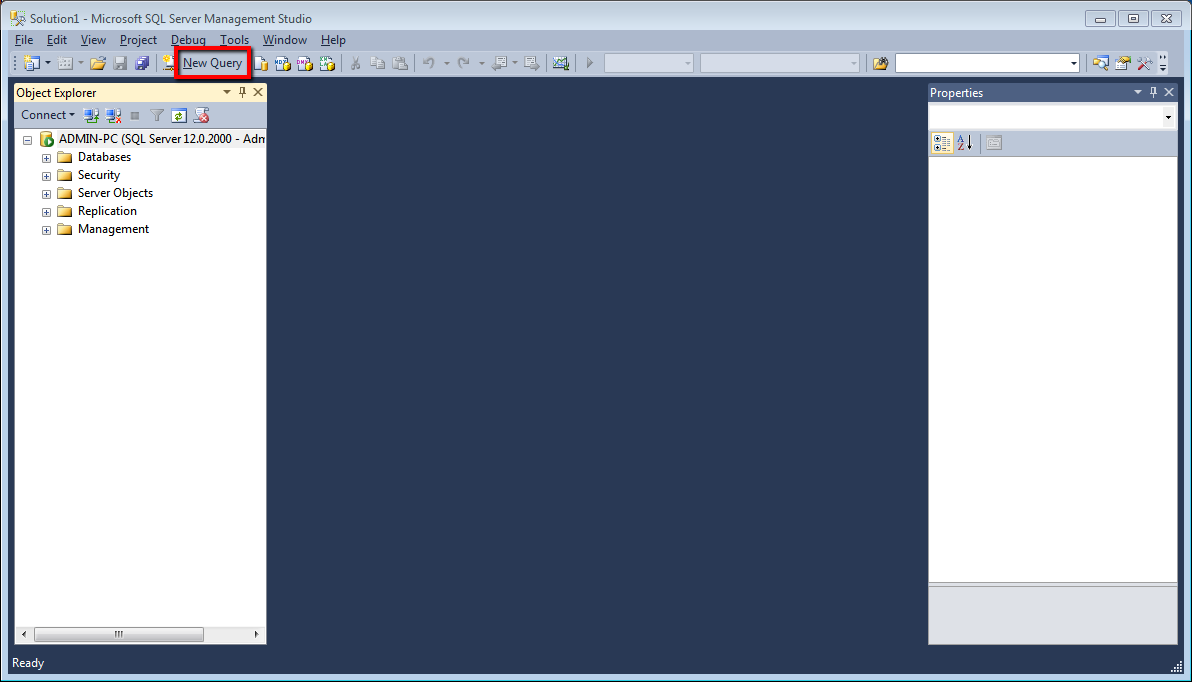
- Open SQL Server Management Studio.
- Connect to the Database Engine.
- From the Standard bar, click New Query.
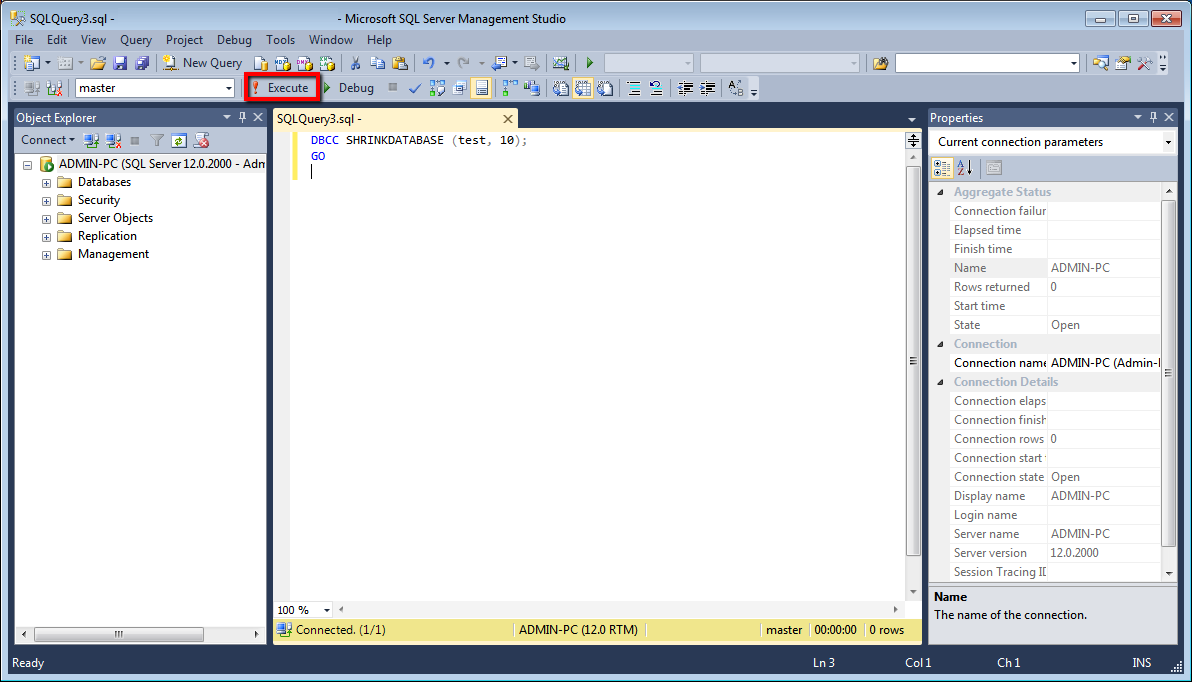
- Type the following SQL command into the query window and click Execute.
DBCC SHRINKDATABASE (DatabaseName, 'target percent') --
Example:
DBCC SHRINKDATABASE (test, 10);
GO
This command shrinks the database named test to leave 10% free space.
That’s it! By following these steps, you can safely shrink the SQL Server database size.
For better performance and full control, consider using our VPS hosting optimised for database workloads.
If you found this article helpful, you will definitely appreciate our support services.