This article provides a step-by-step guide to changing the Domain Name System (DNS) resolver on Windows 10. By changing your DNS servers, you can experience improved Internet performance.
Follow these steps to change the DNS settings with Control Panel:
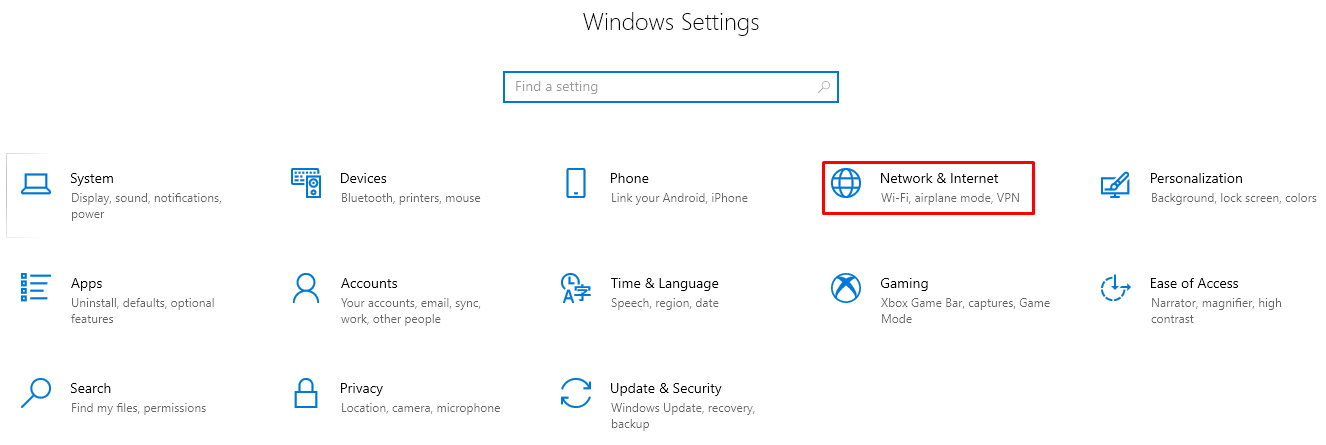
- Open the “Window start menu”, click on the “Settings” button.

- Select “Network & Internet”.
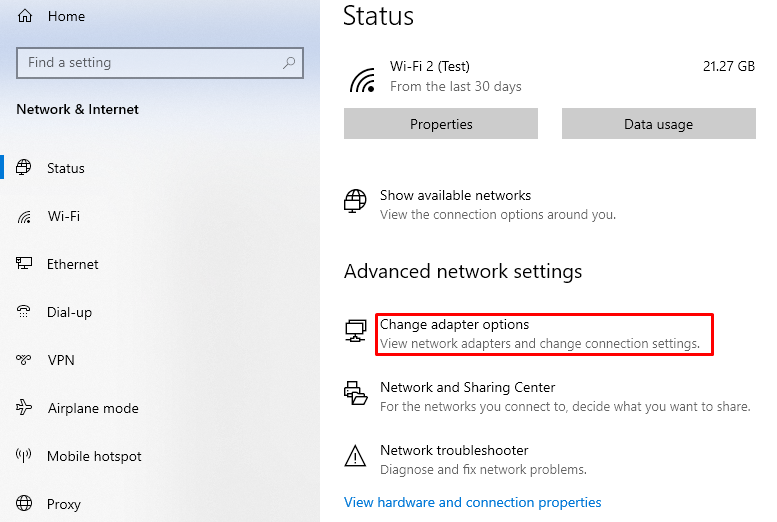
- Click on “Change adapter options”.
- Click on “Ethernet” or “Wi-Fi”.
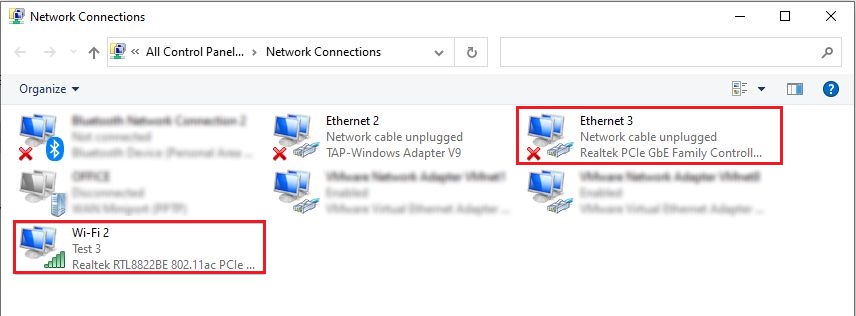
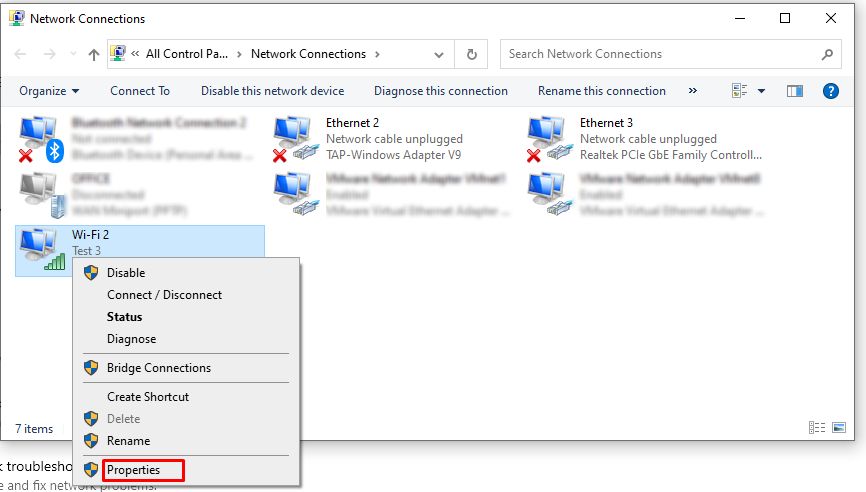
- Select “Ethernet” or “Wifi”, and right-click and click on the “Properties”.
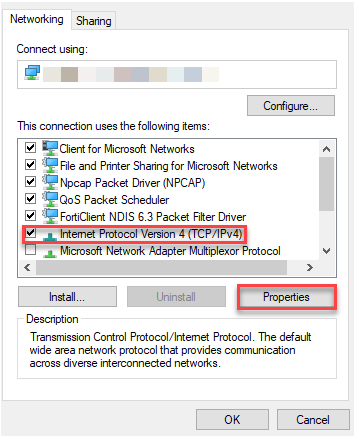
- Select “Internet Protocol Version 4 (TCP/IPv4)”.
- Click on the “Properties” button.
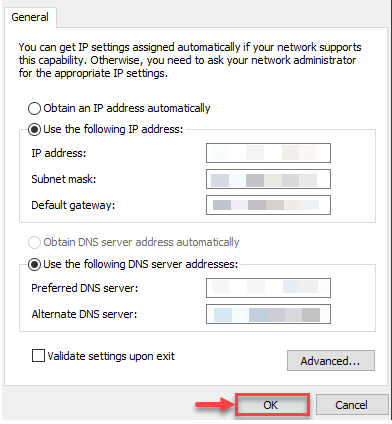
- Next, click on the radio button next to “use the following DNS server addresses”.
- Enter a new DNS address and you need to add a secondary DNS server address in the following line.
- Click on “OK” button to make the changes.
Once the steps have been completed, you should be able to use the new resolvers to connect to the internet. It might be necessary to restart the device to restore its IP address configuration.
In this way, you can change DNS resolver on Windows 10.
Looking to optimise network performance?
For greater control over DNS and connectivity, consider using a VPS with dedicated network resources.
For greater control over DNS and connectivity, consider using a VPS with dedicated network resources.