IP forwarding is the feature that allows Linux OS to receive network packets arriving on one interface and then forward them to another network. Most Linux distributions disable IP forwarding because not everyone needs this feature. However, you have to enable IP forwarding if you want to set up a Linux router, gateway, VPN server, or connect multiple networks.
Enable IP Forwarding
There are two ways to enable IP forwarding on Linux: Temporary activation and Permanent Activation.
First, we will check if the current IP forwarding is enabled or not.
Here we have to query the sysctl kernel value net.ipv4.ip_forward to check if IP forwarding is enabled or not: Using sysctl:
sysctl net.ipv4.ip_forward
net.ipv4.ip_forward = 0
Or just check out the value in the /proc system:
cat /proc/sys/net/ipv4/ip_forward
0

As per the above examples, we can see this was disabled (as shown by the value 0).
Temporary Activation
The activation and deactivation of IP forwarding, in IPv4, as is IPv6, is handled in /proc files. This is “/proc/sys/net/ipv4/ip_forward” for IPv4 and “/proc/sys/net/ipv6/conf/all/forwarding” for IPv6.
If we do a “cat” on these files, we will see that they are by default to 0, to activate the IP forwarding temporarily, it is enough to set them to 1. One can then modify the file or use the “sysctl” command:
sysctl -w net.ipv4.ip_forward=1

Or, following is one more command to enable temporarily:
echo 1 > /proc/sys/net/ipv4/ip_forward
Permanent Activation
To enable these changes permanently, you have to modify the configuration file of sysctl so that it loads our modifications each start. It is the file “/etc/sysctl.conf” to activate IPv4 IP forwarding. We will add or uncomment this line:
net.ipv4.ip_forward = 1
For IPv6, we will do the same with this line:
net.ipv6.conf.all.forwarding=1
The configuration can then be reloaded so that the changes take effect immediately:
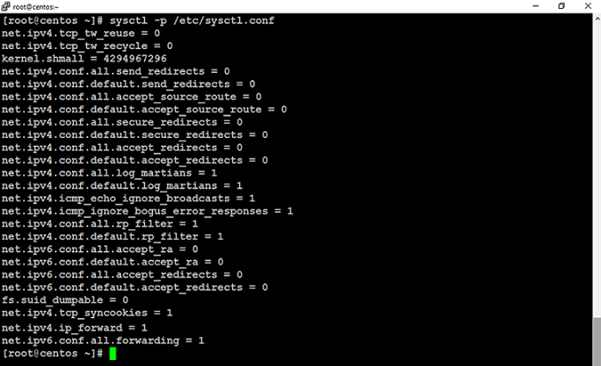
sysctl -p /etc/sysctl.conf
That’s it! You have successfully performed the activation.
You have now successfully set up IP forwarding on your Linux system by following these steps. It can now forward network packets between networks.
For better control over routing and network settings, consider using a Linux VPS with full system access.