This guide explains how to configure FTP clients in cPanel. To auto-configure FTP client using FTP applications such as FileZilla, CoreFTP (for Windows), or Cyberduck (for Mac), users can use the Configure FTP feature in cPanel.
Note: This guide explains how to configure FTP clients in cPanel. The Configure FTP Client feature can provide configuration files for supported FTP clients such as Core FTP and Cyberduck. If your preferred FTP client does not have a downloadable configuration file available, you must configure it manually using the FTP connection details shown in cPanel.
Let us follow the steps:
- Log in to cPanel.
- First, install the FTP application on your computer if not installed.
- Select the “Files” category and click on the “FTP accounts” sub-option.
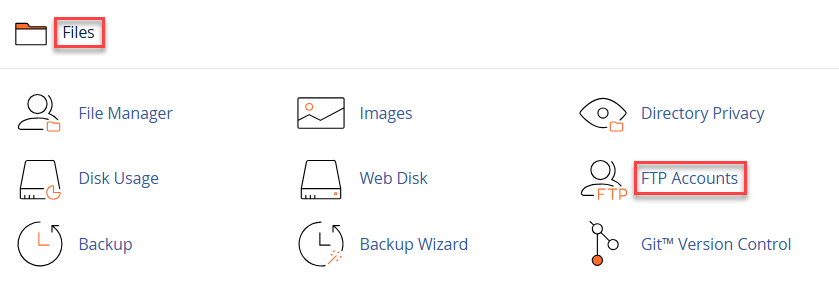
- Scroll down and select the FTP account you want to configure on your FTP client.
- Click on the “Configure FTP client” option under the “Actions” tab.

- Once you click the button, configuration files will open up.
- If a configuration file is available for your FTP client, download and open it to import the connection settings automatically. If your client is not listed, use the Manual Settings section to configure the connection manually, including the server name, username, password, protocol, and port
- The file will be downloaded to your local PC.
- Access the downloaded file to activate the initiation of the FTP client and begin the automated configuration process.
In this manner, you can configure FTP in cPanel. For such informative articles, visit our KB section.
Want to set up FTP access for users? Learn how to create a new user account in our guide on How to Configure a New User Account to Access the FTP Server.