You can use cPanel’s User Manager tool to create additional user accounts for e-mail, FTP or Web Disk services. Here, we’ll explain how to create an account, set up their password and specify services that are available to that user.
Accessing User Manager:
- Log in to your cPanel account.
- Scroll to the Preferences section and click on User Manager.

- Once User Manager opens, click the Add User button to begin creating a new user account.

- Create the new user account by filling in the form provided. You will need to input the following details:
- The user’s full name.
- The account username.
- If you have multiple domains, you can specify the exact domain(s) the user can access.
- An e-mail address where the user can be contacted.
- You also have the choice to let the user create their own password or to provide them with one.
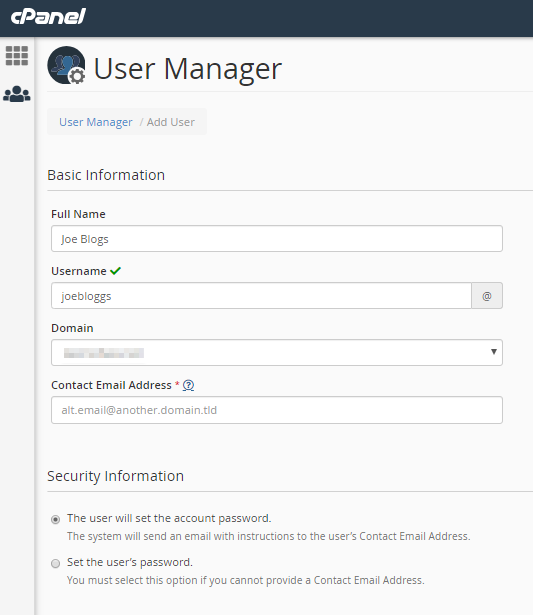
If you let the user set their own password, they will be sent an email with instructions on how to do this. If you set the password, a dialog box will open where you can either generate a random password or input one you have created.
- Specify the services the user can access.
You can enable or disable the services the user has access to by clicking the slider next to each of the service boxes near the bottom of the form.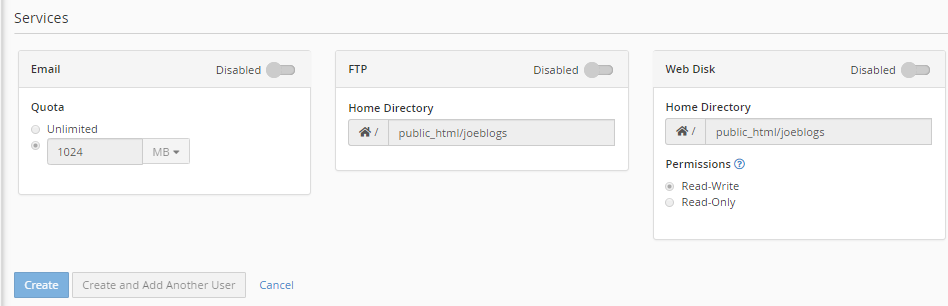
When you enable a service, you are able to set the options for it.- Email options let you limit the size of the user’s email inbox.
- FTP options let you limit the maximum size of the files that can be uploaded and stored.
- Web Disk options let you limit the user’s access to directories and control whether they have read/write or read-only permissions.
- Once you have completed inputting the user’s details and granted the necessary access and permissions, click the Create button at the bottom of the page. The new user account will now be created.
That’s it!! In this way, you can easily create a new user in cPanel.