This guide will explain how to set up Google DNS on macOS. Setting up Google DNS on macOS can improve internet speed, security, and reliability by using Google’s fast and globally dispersed DNS servers.
Steps to be followed-
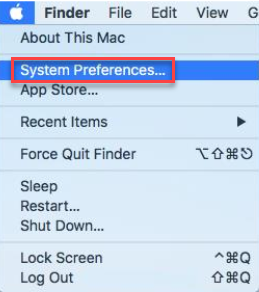
- Open the “Apple menu.”
- Select the “System Preferences” option from the menu.

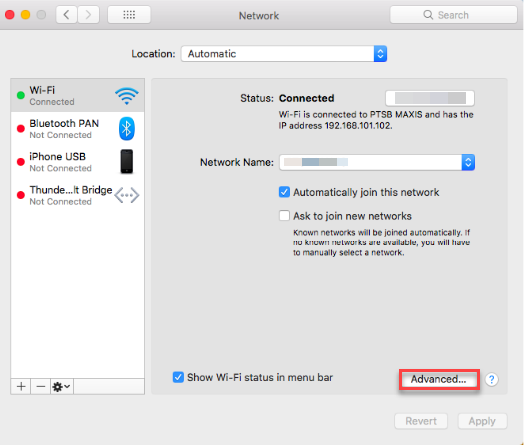
- Click on the “Network” sub-option.

- If you encounter a locked padlock icon in the left corner, click it to alter settings. Enter your password if prompted.
- Select the connection you wish to adjust and click “Advanced.”

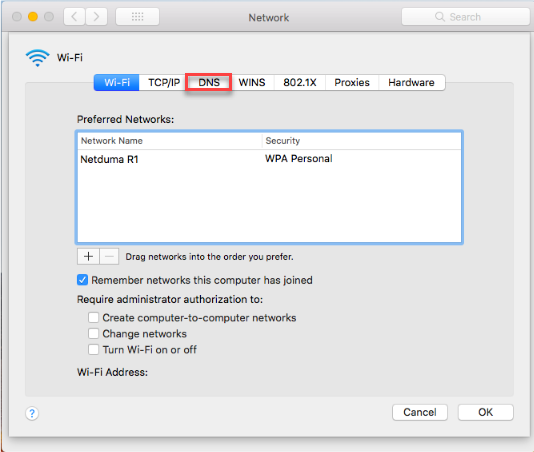
- Access the “DNS” tab.

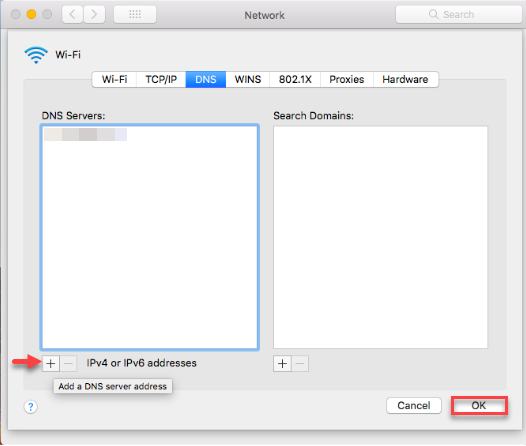
- To add new DNS server addresses or replace existing ones, click the plus (“+”) icon.
- Input the following DNS server addresses-
8.8.8.8 and/or 8.8.4.4 for IPv4.
2001:4860:4860::8888 and/or 2001:4860:4860::8844 for IPv6. - Click “OK” and then “Apply.”

This way you can set up Google DNS on macOS. If you encounter any issues, seek help from our support team. They are available 24X7.
