In this digitized world, every person knows how important a website is. If you don’t have your business website, you cannot stand out in the internet marketplace.
Launching a website requires uploading files to a web server so that your potential customers can view your website. One of the most used control panels is cPanel. With cPanel, you can easily upload your website files, images to the server.
Launching a website requires uploading files to a web server so that your potential customers can view your website. One of the most used control panels is cPanel. With cPanel, you can easily upload your website files, images to the server.
In this step-by-step process, we’ve explained how to upload files from cPanel that actually establish your online presence.
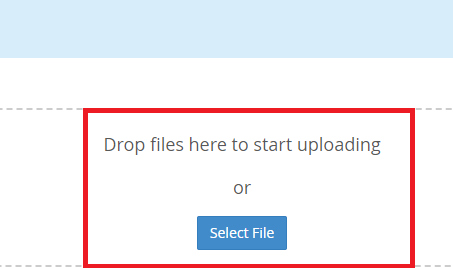
Here we’re going to upload a “Report of the Day” file to the public_html folder in File Manager.
Using the cPanel File Manager to Upload a File:
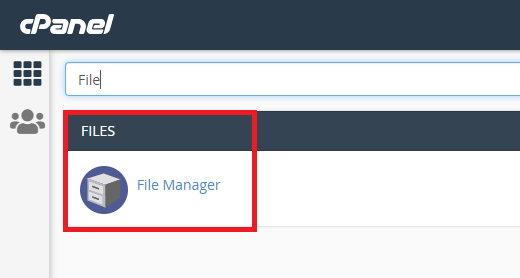
- Log into cPanel.
- Choose “File Manager” from the files section on the home screen.
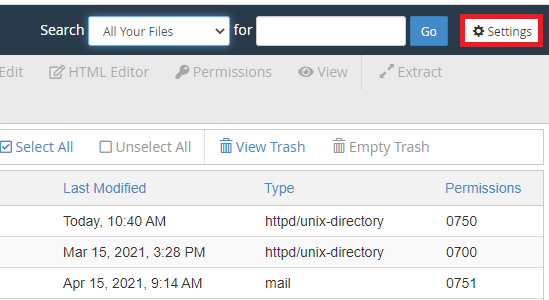
- In the File Manager window, click the Settings button.
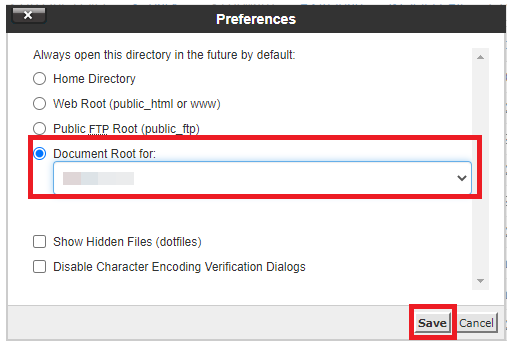
- Next, choose where you’d like to start. For this example, we’re going to use the WebRoot option – which is the public_html folder. Since we’re uploading to the public_html folder we do not need to navigate anywhere else.
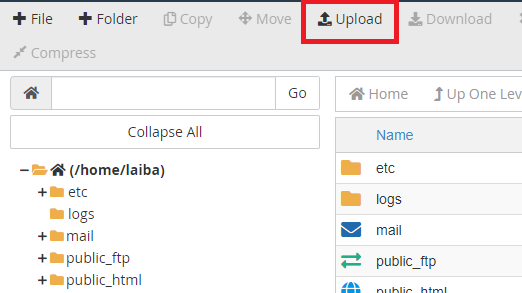
- From the icons at the end, choose “Upload”.
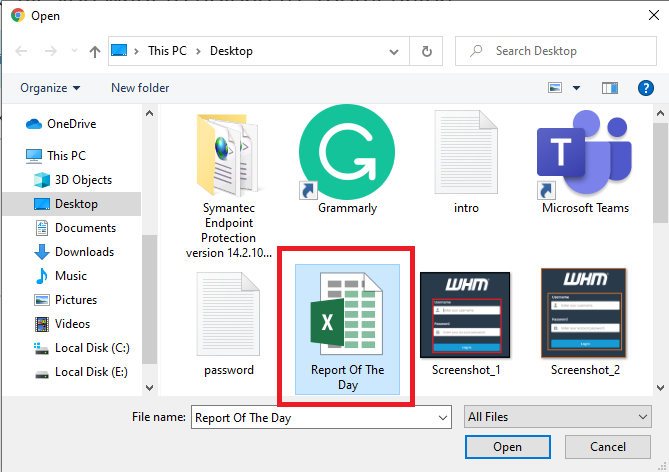
- Click the “Choose File” button to navigate to the file you want to upload on your local computer.
- Select the file and click “Open“. Once the file is finished uploading you can click on the link in the centre of the screen to return to the folder you uploaded the file to.
- Once the upload is done, you can see the uploaded files in the directory

Also Read: How to Upload the HTML and CSS file to cPanel
